As a lifelong Yamaha snowmobile enthusiast (bought my first new Yamaha way back in 1971 as a wee lad in high school) I’ve watched Yamaha along with the rest of the snowmobile industry that has survived through the glory days of the 70’s and 80’s, followed by the lean years starting in the late 90’s to the present day. It is truly mind-boggling to see the remaining OEM’s are still capable of bringing to market the engine, drivetrain, and suspension technology that we enjoy today in an ever shrinking market place.
Until I took a test ride back in 2005 on the first year Apex, I had always scoffed at the idea of a 4-stroke powered sled. One ride was all it took for me to decide that the power band and other benefits of the Yamaha 4 stroke was all that I would ever need. I’ve been riding a 2006 Apex-based sled with a fair amount of enhancements since the Apex was first introduced. As the years went by I had been hoping to see Yamaha introduce a new model that would appeal to me as an upgrade from my trusty Apex, but nothing appeared on the horizon until MY14 when the “mutual supply agreement” between Yamaha and Arctic Cat was announced. The new Viper looked intriguing to me at the time and after a couple test drives of the Viper I was impressed with the ride and handling, but I was left wanting more beans under the hood after being used to the power band of the Apex. Aftermarket turbos and superchargers were never a consideration for me. I’ve been waiting for a motor package that would surpass the power of the Apex and that was totally designed by Yamaha from the ground up.
Fast forward to MY17… the wait is over
When Yamaha announced that for MY17 they would be releasing the new SideWinder series of sleds I was “All In”. Based on the stout and refined Arctic Cat ProCross chassis and powered by the newly designed from the ground up Yamaha motor that featured a factory installed turbo and Yamaha designed electronics, the sled that I had been anxiously waiting for was finally here as the new platform for my latest project.
I’ve built a few other project sleds over the years using Yamaha sleds anywhere from Sno Scoots to Vipers, SRX’s and Apex’s. Each of these projects was based on my personal passion of the sport and to build something unique using the different platforms as a foundation to show how you can create your own custom snowmobile for your favorite riding area and style. With each of these previous projects, I’ve been fortunate to work with various aftermarket companies to showcase their products that were added to each project sled to create its uniqueness and have appreciated the relationships that have been formed with the owners of these companies.
Where to start?
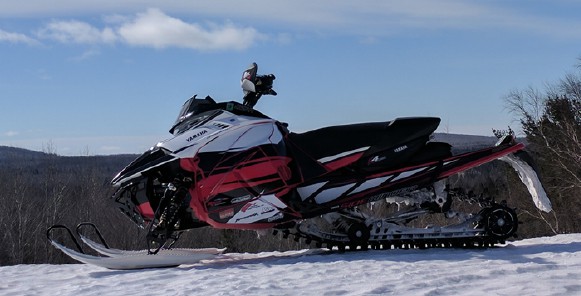
This project sled is all about creating the ultimate 4 stroke trail-taming beast that I could build starting with the new 2017 Yamaha SideWinder with the 998cc 3 cylinder 4 stroke Genesis turbo engine. I wanted to show how to take an already great platform to the next level by showcasing various aftermarket products. This sport is all about fun and by choosing to make some enhancements to your sled you can greatly increase the fun factor along with making your own sled unique.
After recently celebrating my sixth birthday with a zero in it I wanted to make sure I chose the best SideWinder for my riding style and favorite riding areas. Over the years I’ve enjoyed going off trail as much as riding groomed trails but as the years have clicked by so has my preference for sticking to the trail. My wife and I have found the best riding area for our style is the Keweenaw area in the western U.P. of Michigan. The trails in this area are very diverse and also have an outstanding grooming effort, but what makes this area our favorite is the long riding season and the copious amount of snow that falls each season. You don’t have to wait for “system snow” to come your way – all you need is for the wind to blow across Lake Superior and it snows. And snows. In a typical winter you will see well over 300+ inches of snow fall, often approaching 400 inches. This is six times the amount that usually falls in the surrounding areas to the south, thus the riding starts early and lasts late, with plenty of fresh in-between.
With Yamaha offering no less than 12 different SideWinder models for MY17 with track choices of 129”, 137”, 141”, 153”, and 162”, along with a choice of suspensions and shock packages, I narrowed my choice to the LT-X LE model with the premium Fox shock package as the platform to start with for this build. The 137” track length along with the coupled suspension would be a perfect place to start.
One other decision to make was the dealer to order the sled from. This decision was a no-brainer as Pat’s Motorsports located in Greenland, Michigan is located right in the heart of our favorite riding area and is recognized as an outstanding Yamaha dealer in both sales and service. Owner Kip McIntyre has put together an outstanding group of employees and he is also a passionate and seasoned snowmobiler. The trail goes right through the shop’s parking lot and is a favorite and convenient place to gas up your sled while riding in the area. Pat’s Motorsports also is a supporter of the area’s grooming efforts and truly supports snowmobiling on many levels.

The Goal Line
The main objectives of building this sled were:
Improve the already outstanding suspension and handling of the sled to bring the riding experience to the next level while retaining the stock power level.
Create a unique look for the sled that was both clean and aggressive looking while retaining the Yamaha colors with keeping an OEM look.
Improve the ergonomics of the sled so that it worked the best for my style of riding and body size and weight.
Getting the most efficient power output to the snow by improving the clutching and traction for the snow conditions that I ride in.
Suspension and Handling
With the LTX-LE already coming equipped with Fox Kashima coated QS3R shocks some might think it would be hard to improve on the suspension. I’ve come to appreciate the ability to fine tune my suspension over the years using premium grade shocks and have worked with HyGear Suspensions in the past. Ross Benson from HyGear suggested upgrading the stock shocks to their exclusive line of Custom Axis Shocks that they have tested and refined over the years with this chassis that are fully adjustable and are custom built for each specific rider weight and riding style. I chose to go with the complete package of front suspension ($1749.99) and rear suspension shocks ($1599.99) and the HyGear recommended rear torsion springs ($169.99) that work to increase weight transfer and offer a plusher ride with the coupled skid frame. The Custom Axis shocks have both high and low speed compression adjustability along with rebound adjusters. The adjuster dials on the Custom Axis shocks allow for finer tuning (20-25 clicks) than the stock shocks (3 clicks). HyGear dyno tests each shock before shipping them out to ensure they’re delivered with the highest standards.
With the Custom Axis shock package installed in the sled I anticipated higher speeds going down the trail especially as trail conditions got whooped out. These higher speeds can generate more stress on other suspension components that can lead to parts failure. To bolster some known weakness in the rear suspension I decided to beef up the stock front arm axle with a larger diameter and stronger axle (AC #3604-711) and its bushings (AC #3604-791) and mounting bolts (AC #8408-051). I also replaced the stock aluminum center shock mounting axle with a steel axle (AC#3604-798) for added durability.
For the ultimate in hyfax durability I installed a set of Dupont Vespel Hyfax ($159.99) that will outlast the stock hyfax and will offer the longest service life possible.
Speaking of durability I contacted Todd White at J&T Products to add his Stealth Big Wheel Kit to the rear skid axle ($240). High quality parts, added stability, less friction, and better hyfax wear are all qualities of the kit. It replaces the stock tri-hub with a heavy duty 1.25” anodized axle that uses slightly oversized diameter heavy duty wheels with replaceable bearing wheels.
To gain the best adjustability in the weight transfer of the rear suspension I installed the Racewerx Quick Adjust Rapid Coupler Blocks ($159.99) that offers six positions to choose from to either increase or decrease the weight transfer without using tools. Quick and easy adjustability to dial in your ride as trail conditions change. This was a great addition as it allows for more weight transfer than the stock set up that results in less ski pressure than the stock set up for lighter steering effort.
To bring the cornering and handling of this sled to the next level I was able to source a brand new set of Zbroz Racing 45” wide stance a-arms through Doug Matejcek from Racewerx. These wide stance a-arms are no longer available from Zbroz Racing (due to lack of interest) but they were just what I was looking for to increase the stability of the sled at speed and to increase the cornering ability of the sled. These a-arms do not allow for the use of a sway bar and also require the front suspension shock to be slightly longer than stock due to the position of the shock mount on the lower a-arm. Nate Zollinger from Zbroz Racing was extremely helpful in providing me with the exact shock length required and the recommended dual rate spring set up to use with these wide stance a-arms even though they no longer sell them. Zbroz Racing still carries their own line of aftermarket a-arms that are stronger and lighter than the OEM a-arms.
To complete the cornering and handling package of the sled I needed skis that would go where I pointed the sled in changing snow conditions with light steering effort and also keep the front of the sled on top of the snow when venturing off trail. I made the call to Starting Line Products to order their MoHawk Skis. These skis proved to be an awesome match for the sled. The MoHawk skis were specifically designed for the modern rider forward sleds with a target of crossover sleds. These skis are a perfect match for the rider forward ProCross chassis and once you’ve got the rear suspension dialed in for these aggressive skis you’ve got a sled that will handle and steer regardless of the snow conditions with very light steering effort. With a wider width than the stock skis and a very unique bottom profile the MoHawk skis will also keep the front end of the sled on top in deep snow instead of plowing through the snow. My confidence level went up substantially with these skis whether driving deep into a corner at hair on fire speed or diving off trail. To match the color scheme of the sled I went with White bottoms ($311.90) with Black mounting saddles ($91.90) and Black loops ($89.90). To complete the ski package I mounted the SLP #35-126 single runners ($74.95) to the skis. These runners proved to be the perfect match to the skis for the length of the track and lug height in all snow conditions encountered.
Getting the right look
For anyone wanting to change the look of their sled with a custom design I would say to look no further than Robb Kaiser at Blown Concepts. I’ve worked with Robb on every custom project that I’ve done in the past and his work has always been top shelf. I simply let him know the overall concept that I’m looking for along with the colors and he consistently creates a graphics package that always nails down the look that I wanted with a few of his own ideas. With this project I wanted to stay with the Yamaha heritage colors of red, white, and black. I wanted an aggressive looking package that still retained the Yamaha OEM look and Robb once again created just the look that was my target. I spent a fair amount of time with Robb at his shop and came away with a new found appreciation for the time involved in a project like this. With the new SideWinder hood and side panel design, all new templates needed to be created. The SideWinder has many more angles on these components that took a considerable amount of time to complete. Robb’s specialty is creating custom designs and his shop is used by many professional racing teams. He has created custom designed graphics kits sold by Yamaha.

Another person that spent countless hours working on this project was Doug Matejcek from Racewerx. The unique Racewerx front bumper design would be the perfect addition to the aggressive look that I wanted on this project, but the only problem was once again since the new SideWinder platform used a whole new front clip that none of the previous Racwerx bumpers would fit. Doug used this sled to design and test fit his newly designed front bumper for the SideWinder/Thundercat. He is a true artist and perfectionist when it comes to designing his products and is the only one in the industry who makes laser cut aluminum bumpers instead of tubular bumpers. I found out first-hand just how much time and effort it takes to design a bumper for a new platform. I’ve currently got a pre-production bumper on the sled and the production bumpers will be available for the upcoming season. The new Racewerx design has a clean and aggressive look that flows with the lines of the SideWinder with nicely designed hand holds on both sides that easily allow both hands to lift the front of the sled compared to the stock narrow bumper. It also does a great job of keeping the snow from building up on the intercooler. It looks and fits great with added protection to the vulnerable front clip.

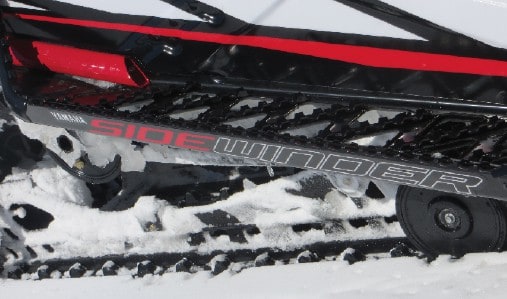
One additional modification that was made that really helped change the look of the sled to the aggressive look that I was going for was to have the rear skid rails and ski spindles changed from the stock white color to black. I also had the new wide stance a-arms and front shock springs powder coated black. While powder coating might not be the sexiest change to a sled, having all of the suspension components black really cleaned up the look of the sled. Having the powder coating done by a professional shop is worth it in looks and especially long term durability of the coating. I hooked up with Clinton Houle, the owner of Race Coatings. The finished products turned out with an outstanding finish and no signs of the finish chipping off this season. Race Coatings has built a great reputation for coating components for many of the top aftermarket shops and offers a wide range of color choices to add a custom look to your sled.
For a nice and clean finished look to the rear of the sled a Racewerx Seat Bolt ($19.95) was installed to replace the stock torx head seat bolt. This is a machined billet aluminum part and offers tool-free access to the battery found under the seat.

One final touch was to eliminate the red color on the rear panel of the seat using some spray on black dye to give the seat a better flow with the graphics of the sled. I kept the red and white stripes on the seat that flow with the other graphics of the sled.
Due to the lack of available Yamaha accessories last season I wasn’t able to fully complete the project to my satisfaction. No windshields were available that I thought looked good on the sled and offered better protection than the stock windshield. I’m also planning on installing a larger tunnel storage bag to replace the small stock bag. Fortunately Yamaha has caught up on their accessories and now have some decent looking taller windshields and a better selection of tunnel storage bags for this season.
Make it fit
To improve the ergonomics of the sled I hooked up with Rox Speed FX that was founded by the late Rocky Cutsforth. Rocky was the person that first inspired me back in 2003 to start building custom sleds after I noticed some of his spectacular creations. His cousin Chris Ohlin has taken the company reins since Rocky’s passing and runs the company with the same passion that Rocky had. After talking to Ryan Jensen at Rox Speed FX I decided to install their 6”-8” Height Adjustable Handlebar Risers ($159.99) that allow for quick tool-less height adjustments. For some added warmth on the hands while riding I also ordered their new Design Your Own Flex-Tech Handguards ($160). Their Flex Tech Handguards have been an industry standard for SnoCross racers for their outstanding protection and their latest offering allows you to custom design your own handguards with color choices on the panels, logo, and stitching to create your own unique look. To mount the handguards to the handlebars I installed their aluminum mounting brackets for the Hayes brake reservoir ($50) found on the SideWinder. To give the handlebars a finished-off look I also installed a Rox Rubberized Bar Pad ($19.95) along with their ISOC Front Number Plate ($15.95). I’ve used this number plate on many sleds in the past as a great location to install my outstate trail stickers instead of applying the sticker to the windshield. I had Blown Concepts design a custom graphic for the number plate. One final ergonomic addition was to install the Rox Skinny Grip Strip Kit ($49.95) on the running boards. I had the strips anodized black to match the sled. These little strips rivet on to the top of the running boards and really allow the bottoms of your boots to stay firmly planted in place, instead of having your feet and legs flail around like Gumby going down a rough trail. Along with the Rox Skinny Grip Strips I also added some Arctic Cat Footrest Gussets #2707-198 right side, #2707-199 left side ($25.16 each) to keep my feet locked in when the going gets rough.

Putting the power to the white top
To get the best power delivery to the snow I contacted Allen Ulmer from Ulmer Racing to get his latest SideWinder Stage 1 Clutch Kit ($249.99). I’ve known Allen for many years and his SideWinder clutch kit came perfectly dialed in for the sled. I was looking for a nice low engagement speed and Allen set me up with an optional primary spring that has worked out perfect for the sled. The lower engagement speed actually gives a better launch without breaking loose the track, but when you put the spurs to her it just gets up and goes. The kit comes with fully adjustable weights that allow you to fine tune the shift pattern to your weight and snow conditions. I like to have a great accelerating sled with a smooth take off.
I also contacted Lonn Peterson at Thunder Products and he suggested I try out his new Holeshot 33-35 reverse angle helix that allows for quicker turbo spool up time. From the short amount of time that I had this helix installed it seemed to give a noticeable boost in the low to midrange acceleration without additional track spin.
To complete the traction package I swapped out the stock Camso RipSaw 2 1.25” lug track with a taller lug Camso RipSaw 2 1.5” lug track for some additional traction. I don’t run studs in my tracks and the 1.5” lug track is the perfect choice for my riding conditions. Not too tall of lugs on hardpack that can generate higher track temps and just tall enough to allow going off trail with confidence. This track has a slightly higher durometer rating than some other Camso tracks for added durability and is fully clipped for better cooling.
As an added safety feature a Yamaha Tether Switch SMA-8JP81-00-00 ($82.99) was installed in case of the unforeseen rider ejection from the sled.
Mission accomplished
I started this project wanting to create the ultimate 4 stroke trail-taming beast that I could using a stock Yamaha SideWinder and bringing it to the next level in both performance and looks while retaining the stock power output and reliability.
Every goal that I set with this build was met and exceeded by working with an exceptional group of individuals. I mention individuals here and not just their companies because of their passion and dedication to the snowmobile industry that they all exude. I’m extremely grateful for their help and support in this project.
From the very first time this sled hit the snow it has exceeded all of my expectations with very little fine tuning needed to get things dialed in. The overall ride and handling in all conditions has been outstanding. From tabletop freshly groomed trails to bombed out washboard trails I have been able to ride this sled faster and in complete control with exceptionally light steering effort. The upgraded suspension and ski mods have definitely given me the results that I was hoping for. The confidence level when driving this sled has been like no other I’ve ever experienced. The graphics and powder coating package gave me the exact look that I wanted; clean and aggressive. The ergonomic additions really added to the overall feel of being able to the control the sled in all conditions.
Having this much power on tap has been an exhilarating experience every time I squeeze the throttle and with the stellar clutching setup it has a very mild engagement speed and the low speed trail manners make the sled very easy to maneuver at mild trail speeds when the turbo hasn’t spooled up. I’ve been able to creep through a bunch of trees off trail in fresh deep snow without auguring out the track. It’s almost unbelievable to drive a sled that delivers such an amazingly controllable power band at mild trail speeds yet has hair on fire acceleration and unbelievable top end speeds.
I would be remiss if I didn’t mention the wealth of information that I was able to gather while building this sled from the web site www.ty4stroke.com. This web site was created by Tom Grawey and is made up of Yamaha enthusiasts that share information to help fellow Yamaha riders. Since this sled was my first ProCross chassis based Yamaha I was able to save a tremendous amount of time and effort by researching any known problems and to get the sled set up properly by reading all of the great information that was shared by fellow site members. I would strongly encourage any Yamaha sled owner to check out this site and to become a supporting member. Tom puts in countless hours to keep the site up to date and even organizes winter rides and summer get together events for members. If anyone would like to contact me with any questions about this project you can message me on the website. My username is VX1R.
I hope that by reading this article I’ve been able to inspire some readers to think about having some fun and doing a few things to their current or future sleds to bring their own riding experiences to the next level. By making some enhancements to your sled to make it your own will only increase your enjoyment of this awesome sport. There are a lot of products out there that you can add on to your sled to make it the best it can be for your riding conditions instead of just settling on what the factory gave you. I hope that you’ll consider doing business with the companies that I’ve worked with on this project as they all are dedicated companies who strive to make sure that you can have the best experience possible with your sled.
By Don Thompson
Contact Information:
Pat’s Motorsports: 906-883-3536 Yamaha Snowmobile Dealer
http://patsmotorsports.com/
Blown Concepts: 612-767-7645 Custom Graphics
http://blownconcepts.com/
Starting Line Products: 208-529-0244 MoHawk Skis
https://www.startinglineproducts.com/
Racewerx: 612-396-7011 Front bumper/skid plate/Quick Adjust Coupler Block/seat bolt
http://www.racewerxinc.com/
Rox Speed FX: 218-326-1794 Riser/Handguards/Bar pad/Grip Strips/Number Plate
https://roxspeedfx.com/
Race Coatings: 651-325-5845 Custom Powder Coating
https://www.racecoatings.com/
Ulmer Racing: 605-387-2833 SideWinder Stage 1 Clutch Kit
http://www.ulmerracing.com/
HyGear Suspension: 607-533-7434 Custom Axis Shocks/Torsion Springs
https://www.hygearsuspension.com/
J&T Products: 810-545-0066 Stealth Big Wheel Kit
http://www.jtatv.com/
Camso: 1-888-722-8466 RipSaw II 1.5”x137” Track
https://camso.co/en/products-solutions/snowmobile
Thunder Products: 320-597-2700 SideWinder Holeshot Helix
https://thunderproducts.com/
Totallyamaha.com: Outstanding Yamaha Snowmobile Website
https://ty4stroke.com/
Yamaha Snowmobiles: 4 Stroke Snowmobiles
https://www.yamahamotorsports.com/snowmobile